Step 1, set up your document
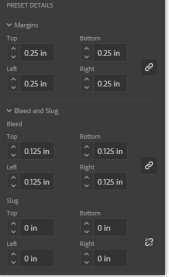
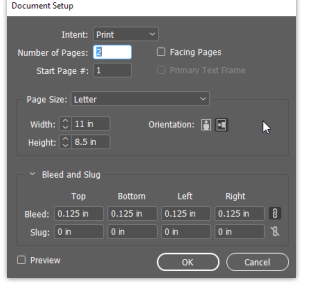
When creating a new InDesign document, set an even measurement in the Bleed and Slug section of your Preset Details window. A good standard is .125 inches (an eighth of an inch). If you’ve already created a document, you can still add a bleed by selecting File > Document Setup.
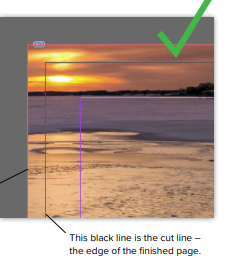
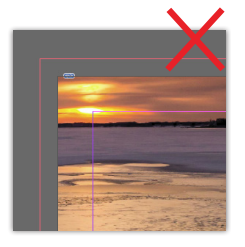
Design to Bleed Line
Make sure any elements that must bleed off the page, like backgrounds, colors or photos, are dragged out to the red bleed line. Do NOT drag it out to the black cut line only. That is the edge of the finished page and will not trim correctly.
Export and Check
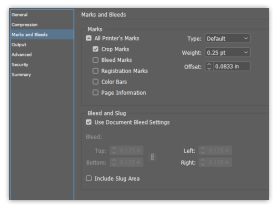
Go to File > Adobe PDF Presets and select your output option (High Quality Print is usually recommended). Select Marks and Bleeds on the left-hand side. In the Marks section, choose All Printer’s Marks, or just Crop Marks. Under Bleed and Slug, you must select Use Document Bleed Settings, or your file will export with no bleed at all. Check your PDF after to make sure the art extends past your crop marks. If so, you’ve prepped your file correctly and it is ready for print!